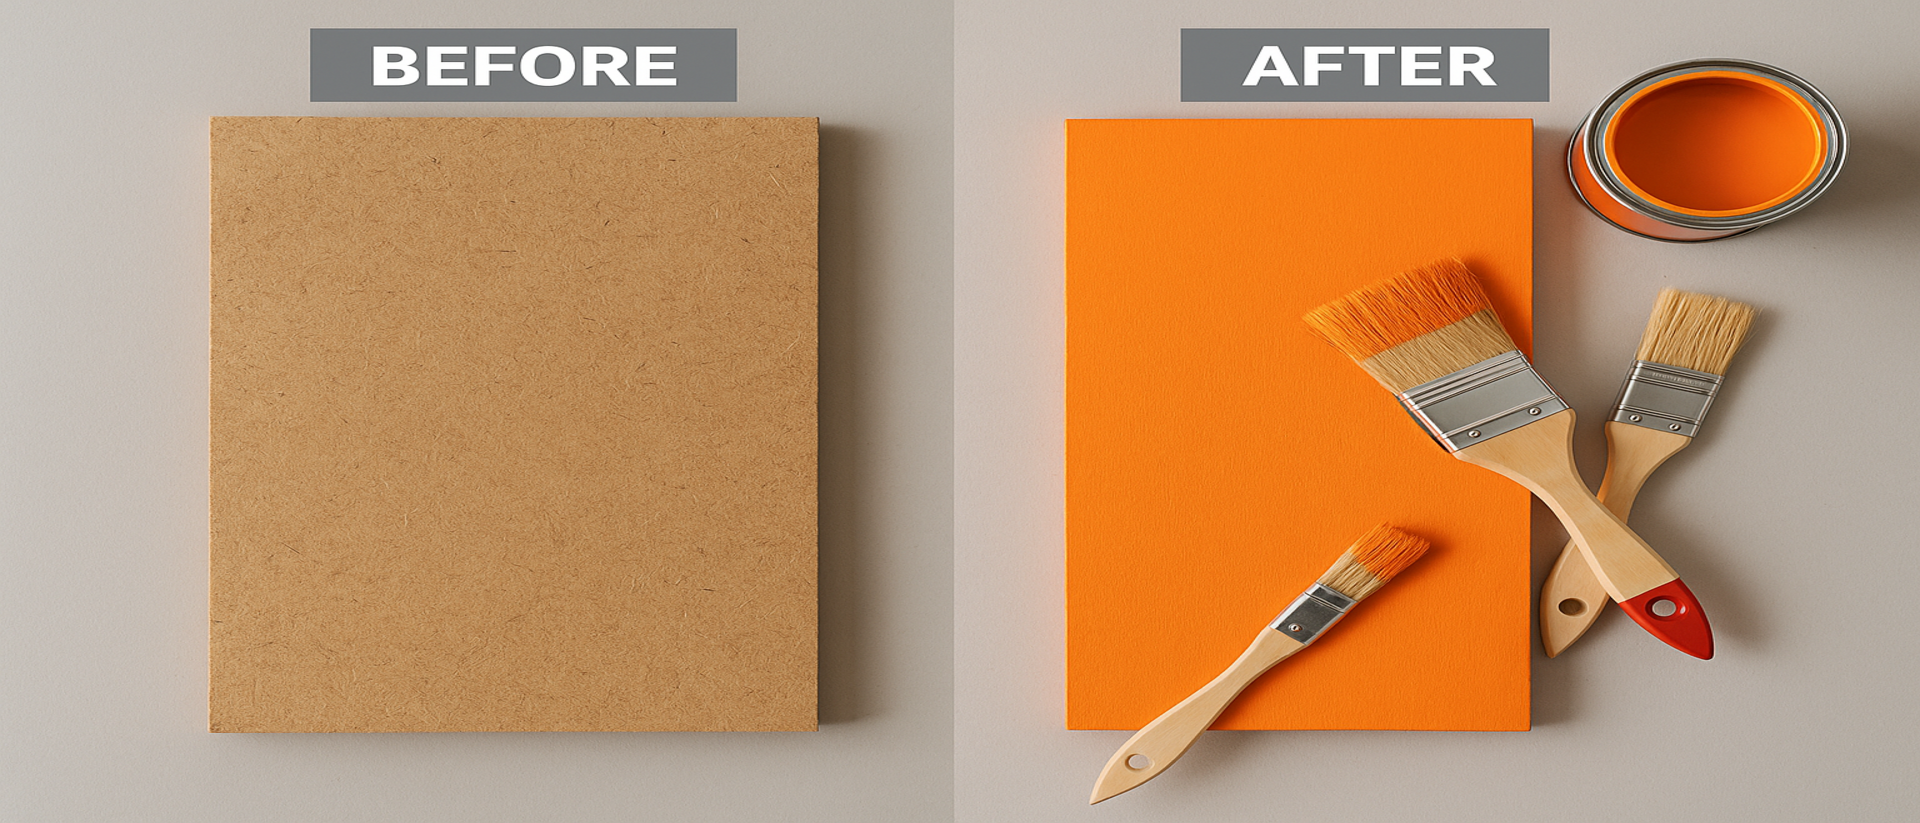
HDHMR boards are known for their smooth surface and durability – but what if you want to paint them to match your decor or create a specific look? The good news is that HDHMR boards can indeed be painted, much like MDF or wood, and they take paint very well as long as you follow the right process. This guide will walk you through a step-by-step process to paint HDHMR board, ensuring a professional and long-lasting result.
Why Paint HDHMR?
Before we get to the how, a quick note on why you might paint HDHMR: - To achieve a certain color or finish (e.g., a matte white cabinet or a pop of color on furniture). - HDHMR’s smooth surface is “ready for painting, laminating, or veneering”, so it’s quite amenable to customization. - Unlike raw plywood which has grain, HDHMR is flat and free of knots, giving you a pristine paint finish similar to painting on MDF but with added moisture resistance.
Step 1: Prepare the Surface
Proper prep is key to any good paint job. HDHMR often comes with a smooth face, but you still need to prepare it:
1. Clean the board: Ensure the HDHMR board is free from dust, grease, or debris. Wipe it down with a dry cloth. If there are any greasy spots (maybe from handling), use a mild detergent solution and then let it fully dry.
2. Sand the surface lightly: Although HDHMR is smooth, a light sanding helps paint adhere better. Use a fine-grit sandpaper (220 grit is ideal) to scuff sand the surface. You’re not trying to remove material, just roughen the glossiness slightly. Sand in circular motions or along the board evenly. Also, sand the edges and any cutouts – HDHMR edges are more porous and benefit from sanding for paint.
3. Seal or fill edges (if needed): HDHMR’s faces are compressed smooth, but cut edges can be a bit more absorbent. If your project has exposed edges to paint (e.g., a shelf without edge banding), consider sealing them. You can apply a thin coat of acrylic sealer or even a joint compound on the edges, let it dry, and sand smooth. This extra step fills the fibrous pores on the edge, yielding a much smoother paint finish on edges. It’s similar to how carpenters seal MDF edges because edges soak up paint more.
4. Dust off: Remove all sanding dust using a vacuum or a tack cloth. A very clean surface is important; dust will ruin your paint finish.
(Time-saving tip: If the HDHMR board is brand new and factory-smooth, some painters skip straight to priming without sanding. However, a quick sand is recommended for best results.)
Step 2: Prime the HDHMR Board
Priming is crucial, especially on engineered wood products, to ensure paint bonds well and to prevent excessive paint absorption.
1. Choose the right primer: A solvent-based primer or a high-quality acrylic primer is recommended. Many professionals use primers labeled for MDF/HDF or wood. Shellac-based or oil-based primers work excellently as they seal the surface. An example is Zinsser BIN (shellac) or an oil-based wood primer. These prevent moisture absorption and make for a uniform paint coat. If you prefer water-based, ensure it’s a thick, high-bond primer designed for trim or furniture.
2. Apply primer coat: Use a brush or roller (or spray if available) to apply a thin, even coat of primer to all surfaces you plan to paint. Focus on edges and corners as well – dab primer on edges to seal them. Don’t worry if the first coat looks patchy.
3. Multiple coats of primer (if needed): HDHMR doesn’t absorb as much as raw MDF, but edges might. It’s often advised to do 2 coats of primer for the best finish. After the first coat dries (follow primer instructions, usually a few hours), lightly sand with very fine paper (320 grit) to knock down any raised fibers or brush marks, then apply a second coat. Thin coats are better than one heavy coat. This builds a nice foundation. As one source says, “numerous thin priming applications” yield stronger finish than one thick one.
4. Sand after priming: Once the final primer coat is fully dry, do a final light sand with fine paper (320-400 grit) to ensure the surface is silky smooth. Wipe away dust. Now the HDHMR board will likely have a uniformly dull, sealed surface – perfect for painting.
Step 3: Painting the HDHMR Board
Now comes the color and finishing part.
1. Choose paint type: You can use oil-based enamel, acrylic latex, or lacquer/PU paints on HDHMR. For furniture or cabinets, many prefer oil-based or acrylic enamels for durability. Oil-based paints (or solvent-based like polyurethane paints) give a hard, durable finish and level out nicely. Water-based acrylic paint is easier to work with and clean up, and newer formulas can be quite durable too (you may want to topcoat with a clear finish for extra durability).
2. If going for a duco (automotive) finish or PU, often professionals spray those for a glassy look. But you can achieve a great finish with brush/roller too using normal wood paint.
3. First coat of paint: Apply your first coat evenly. If brushing, use a good quality brush to minimize strokes. For flat areas, a fine foam roller gives a smooth finish with water-based paints. Don’t try to cover in one go; a semi-transparent first coat is fine.
4. Dry & sand: Let the first coat dry completely (per paint instructions, could be 4-6 hours for water-based, overnight for oil). The board might feel a bit rough as some fibers raise – especially if water-based paint was used. Lightly sand with 320+ grit to smooth it out. This is normal and results in a smoother second coat.
5. Second coat of paint: Apply the second coat of paint. Now you’ll see full coverage. It should look solid in color. Use even strokes/rolls. Tip: Always stroke/roll in one direction on the final pass for uniformity.
6. Additional coats if needed: If the color is light or you want more thickness, you might do a third coat. Just ensure each coat is thin and sanded in between if any imperfections. Many times 2 coats over primer is sufficient for opaque coverage.
7. Allow to fully cure: HDHMR’s sealed surface plus multiple paint layers will give a beautiful finish, but let the paint cure to hardness. Typically, give it a couple of days before heavy usage or mounting hardware.
Step 4: Optional Protective Topcoat
This depends on your paint choice: - If you used a high-quality enamel or PU paint, you may not need any topcoat – it’s already durable and washable. - If you used a basic acrylic paint (like wall paint or craft paint), it’s wise to protect it with a clear coat. Options are polycrylic (water-based clear), polyurethane clear (oil-based), or a furniture wax for a low-sheen finish. For example, a clear polyurethane adds scratch resistance and water resistance, great for a tabletop or cabinet surface. - Apply the clear coat after the paint has dried and lightly sanded. 1-2 coats of clear will shield the color. Ensure compatibility: use water-based clear over water-based paint, oil-based clear over oil-based paint (to avoid potential crackling).
Painting HDHMR: Quick Recap Cheat-Sheet
1. Sand & Clean: Light sand (120–220 grit) on surfaces; seal edges with compound; remove dust.
2. Prime: 1-2 coats of quality primer (shellac/oil primer preferred). Sand between coats.
3. Paint: 2 coats of your chosen paint (enamel, acrylic, etc.), sanding lightly between for smoothness.
4. Protect (if needed): Apply clear topcoat for extra durability (especially for surfaces like kitchen cabinets, bathroom vanity, or kids’ furniture that sees a lot of action).
By following these steps, your HDHMR board can achieve a finish as good as (or even better than) solid wood or MDF. In fact, experts affirm that HDHMR boards offer a smooth, even surface that takes paint exceptionally well – which allows for a wide range of design possibilities. People have successfully painted HDHMR for cabinet doors, decorative wall panels, and even carved designs with two-tone paint.
Extra Tips and Troubleshooting
· Avoid Excess Water: When painting or priming, avoid using overly watery coats on the edges of HDHMR. While the board is moisture-resistant, you don’t want to saturate it. Use normal viscous paint (don’t over-thin it).
· Temperature and Ventilation: Paint in a dust-free, well-ventilated area. If spraying, wear a mask. Ideal temperature is ~20-30°C. Extreme cold or humidity can affect drying.
· Brush vs Roller: For flat large surfaces, a mini foam roller gives an almost spray-like finish (no brush marks). Use a brush for edges or profiled areas.
· If Paint Doesn’t Adhere: If you skip priming and notice paint beading or not sticking well (rare on HDHMR, but possible if surface had oils), stop and prime. Primer is the glue between HDHMR and paint – don’t skip it.
· Painting Pre-Laminated HDHMR: In case you are painting a pre-lam (melamine faced) HDHMR, you must sand thoroughly to remove the sheen and definitely use a strong primer (maybe even a specialty bonding primer). Painting over laminate is trickier but doable with proper prep.
Conclusion
HDHMR boards can be beautifully painted with results that can rival any high-end finish. The key is in the preparation – sanding, priming, and using good quality materials. Many who treat HDHMR like they would treat MDF or HDF in painting find that it behaves similarly, if not better, since it’s dense and stable. By following the step-by-step guide above, you’ll ensure your paint adheres well and looks smooth. Now your HDHMR-made furniture or cabinets aren’t limited to the color of laminates – you can unleash your creativity with paints, be it a classic white satin kitchen or a bold colored shelf unit. Happy painting!
Disclaimer: This article is generated using AI-assisted research and is intended for informational purposes only. While we strive for accuracy, readers are advised to verify all technical, pricing, and brand-specific details with official sources. hdhmr.in is not liable for any decisions made based on this content.